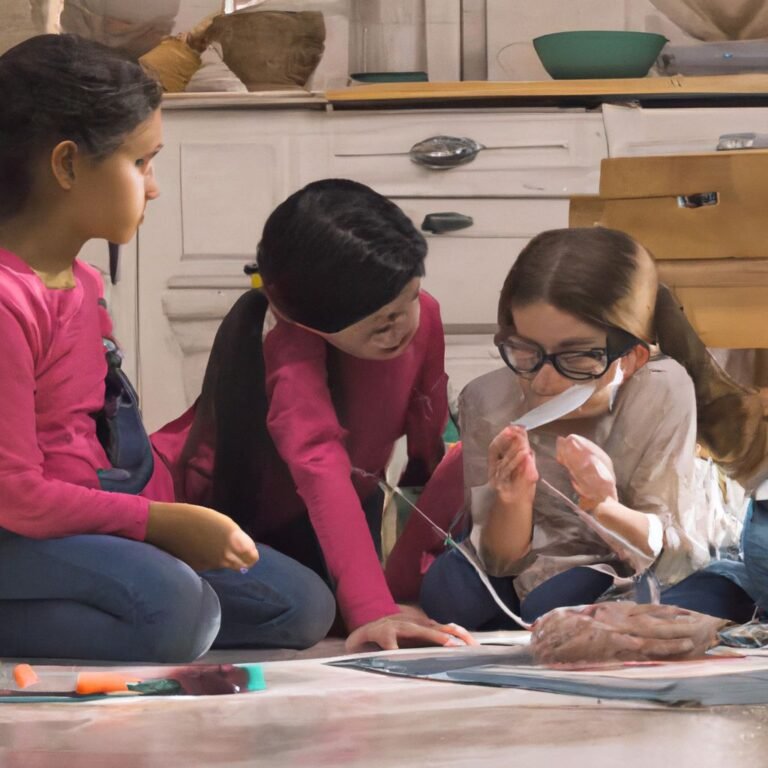
Homemade Lava Lamp Magic as the Ultimate Family Science Project
Remember those groovy lava lamps with the colorful blobs that moved like magic? We can make our own version right at home using simple stuff from the kitchen. It’s not just a cool science experiment, it’s a fun way for the whole family to learn together. This project is a fantastic preschool science activity that shows kids how different liquids behave and what happens when things mix.
Key Takeaways
- Homemade lava lamps are a fun, hands-on way to explore science concepts like density and chemical reactions.
- You can make a lava lamp using common household items like oil, water, and antacid tablets or baking soda and vinegar.
- This activity is a great preschool science activity that engages young children visually and through simple actions.
- Experimenting with different ingredients, oils, or container shapes can lead to further learning and discovery.
- Safety, including adult supervision, is important when conducting any science experiment with children.
Unveiling the Magic: What Makes a Lava Lamp Glow?
The Allure of the Lava Lamp
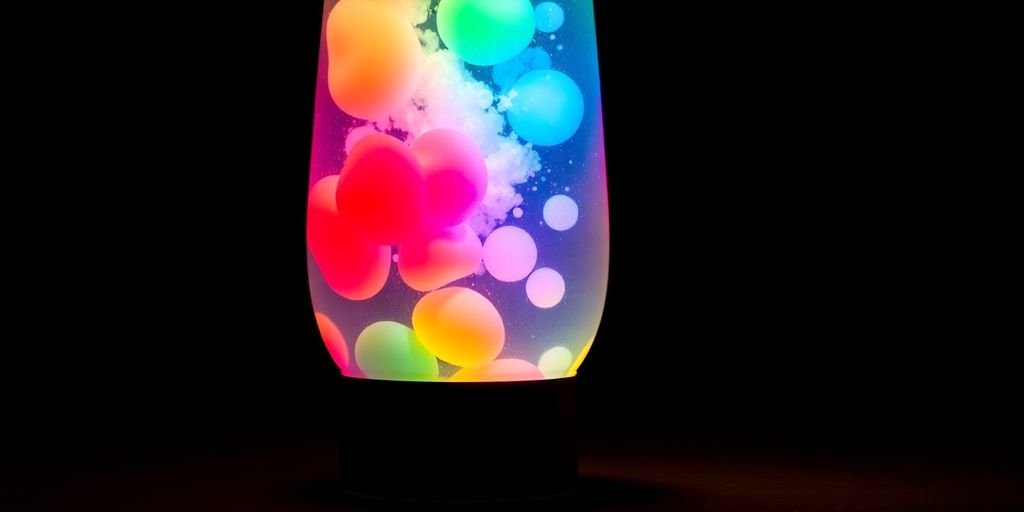
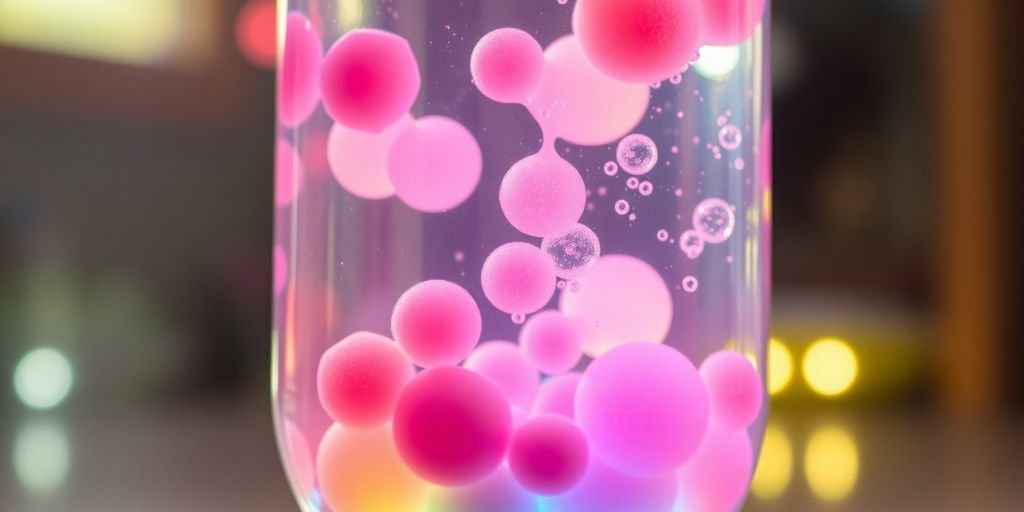
Remember those groovy, hypnotic lava lamps from the past? The ones with colorful blobs that swirled and merged in a slow, dreamlike dance? They weren’t just cool decorations; they were actually showing off some pretty neat science. People have loved them for ages, and they became symbols of a more relaxed, imaginative time. Their unique look comes from a careful mix of physics and chemistry, making a little art piece that moves all on its own. When we make our own lava lamps at home, we get to use the same basic ideas, but in a simpler, just as cool way. It lets kids be the ones creating their own science magic.
DIY vs. Commercial: Understanding the Differences
Commercial lava lamps usually have special wax and a light bulb to heat things up. Our homemade versions, though, use everyday stuff you can find in the kitchen and the power of simple chemical reactions. The “glow” or movement in our DIY lamps comes from how different liquids and gases play together, making colorful blobs rise and fall. It’s not just a one-time trick; it’s a science lesson you can see and repeat, showing big science ideas in a really fun way. It’s perfect for kids who are curious about how things work.
The Science Behind the Swirling Spectacle
So, what’s really going on in there? It all comes down to a few key science concepts:
- Density: Different liquids don’t always mix, and they also have different weights for the same amount of space. Think of oil and water – oil floats because it’s less dense. The blobs in a lava lamp are made of something that’s a bit denser than the oil but less dense than the water, so they float and sink.
- Polarity: Water molecules like to stick together, and so do oil molecules, but water and oil don’t really mix. This is because of their electrical charges, or polarity. Water is polar, and oil is non-polar, so they keep their distance.
- Chemical Reactions: When you add something like an antacid tablet to water, it creates a gas called carbon dioxide. These gas bubbles attach to the colored blobs (which are mostly water and food coloring), making them lighter and causing them to float up through the oil. When the gas escapes at the top, the blobs get heavy again and sink back down.
It’s this constant cycle of rising and falling, driven by simple chemistry and physics, that gives the lava lamp its mesmerizing motion. We’re essentially creating a mini, temporary ecosystem of movement right in our bottle.
Gathering Your Scientific Supplies
Alright, so you’re ready to make some bubbly, mesmerizing science happen right in your own kitchen! Before we get to the fun part, we need to round up our supplies. Think of this like gathering ingredients for a special recipe, but instead of cookies, we’re making a science spectacle.
Essential Household Ingredients
Most of what you need is probably already in your pantry or bathroom cabinet. It’s pretty amazing how everyday items can create such cool effects!
- Clear Plastic Bottle or Glass Jar: A clean, empty water bottle or a mason jar works great. Make sure it’s clear so you can see all the action.
- Water: Just regular tap water will do the trick.
- Vegetable Oil or Baby Oil: This is the main liquid that makes the “lava” float. Vegetable oil is easy to find, but baby oil can sometimes give a clearer view.
- Food Coloring: Pick your favorite color! This is what gives the “lava” its vibrant look.
- Fizzing Agent: This is the magic ingredient that makes the bubbles. You have a few options:
- Antacid Tablets: Like Alka-Seltzer. These are super common and create a good, steady fizz.
- Salt: Regular table salt works, but it creates a slightly different effect than the tablets.
- Baking Soda and Vinegar: This is a classic science combo that will definitely get things bubbling.
Optional Tools for Enhanced Fun
While not strictly necessary, these can add a little extra something to your lava lamp adventure:
- Glitter: For a bit of sparkle in your “lava.”
- Flashlight or Small Lamp: Shining a light through the bottle can make the colors pop, especially in a dimly lit room.
- Funnel: Makes pouring the oil and water a bit less messy.
- Tray or Baking Sheet: To catch any spills, because science can sometimes be a little messy!
Preparing Your Workspace for Discovery
Before you start pouring and mixing, it’s a good idea to set up your area. Protecting your surfaces is key to a stress-free science session.
Lay down some newspaper or a plastic tablecloth on your table or counter. This way, if any food coloring drips or oil spills, cleanup will be a breeze. Have your paper towels or rags handy. It’s also a good idea to have your chosen container and all your ingredients within easy reach so you don’t have to go searching mid-experiment.
Think of it as setting the stage for your own mini science show. Once everything is ready, you’re all set to start crafting your mesmerizing lava lamp!
Crafting Your Own Mesmerizing Lava Lamp
The Antacid Tablet Method: A Classic Reaction
This is probably the most popular way to get that groovy lava lamp effect at home. It’s super simple and really shows off the science. You just need a few things you probably already have in your kitchen.
Here’s what you’ll need:
- A tall, clear container (like a plastic bottle or glass jar)
- Water
- Vegetable oil or baby oil
- Food coloring
- Antacid tablets (like Alka-Seltzer)
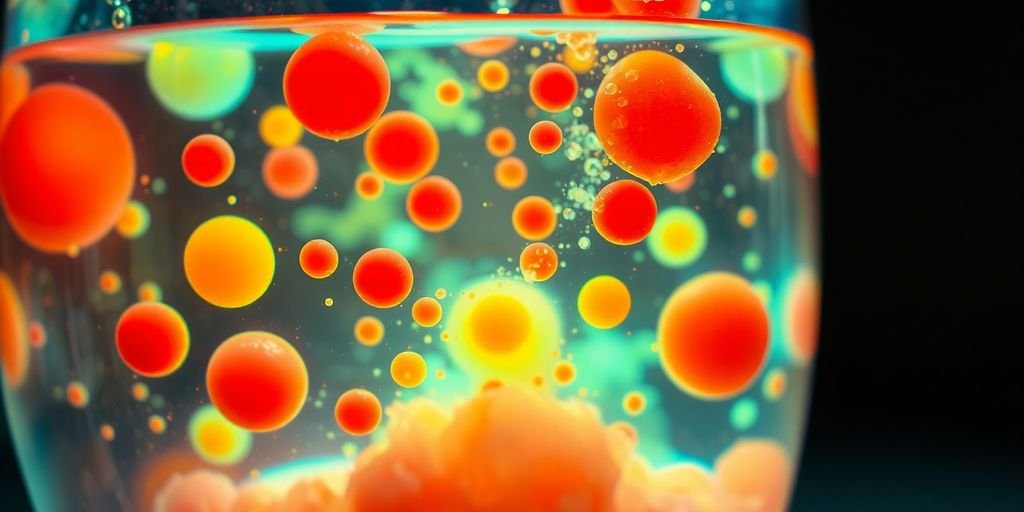
First, fill your container about a quarter of the way with water. Then, carefully pour in the oil until it’s almost to the top, leaving a little space. You’ll see the oil and water don’t mix – that’s because of polarity. The oil floats on top because it’s less dense than water. Now, add a few drops of food coloring. Watch them sink through the oil and mix with the water below. Finally, break an antacid tablet into a few pieces and drop them in. As the tablet fizzes, it creates gas bubbles that grab onto the colored water and carry it up through the oil. When the bubbles reach the top and pop, the water sinks back down. It’s a cool, repeating cycle!
This method is fantastic for demonstrating how different substances behave when they meet. The fizzing action is the star, making the colored water blobs dance.
Exploring the Salt Method for Different Fizz
If you don’t have antacid tablets, salt works too! It’s a slightly different reaction, but still really neat to watch. The process is almost the same as the antacid method.
- Prepare your container with water and oil, just like before.
- Add your food coloring.
- Sprinkle a tablespoon or two of salt into the container.
The salt is denser than both the oil and the water, so it sinks. As it sinks, it carries some of the oil down with it. When the salt dissolves in the water at the bottom, the oil is released and floats back up. It’s a slower, gentler movement compared to the antacid tablets, but it’s a great way to see density in action. You can keep adding salt to keep the show going. This is a great way to experiment with homemade lava lamps.
The Baking Soda and Vinegar Adventure
This is another classic science experiment that works well for a lava lamp effect. It’s a bit messier, but the reaction is quite vigorous.
- Fill your container with water and oil as usual.
- Add food coloring.
- Put a few tablespoons of baking soda into the container. It will sink to the bottom.
- Slowly pour in some white vinegar. The vinegar will sink through the oil and react with the baking soda. This creates carbon dioxide gas, which makes the bubbles that carry the colored water up. You’ll get a really good fizz with this one!
Remember, you can always add more vinegar or baking soda to keep the reaction going. It’s all about playing around and seeing what happens!
The Science Explained: A Preschool Science Activity
This homemade lava lamp is a fantastic way to show little ones some cool science concepts without getting too complicated. It’s all about how different things behave when you mix them together.
Understanding Density and Polarity
Think about oil and water. Have you ever noticed how they don’t mix? That’s because of something called polarity. Water molecules like to stick together, and so do oil molecules, but they don’t like sticking to each other. This is why the oil floats on top of the water – it’s less dense. Density is just a way of saying how much ‘stuff’ is packed into a certain space. The oil has less ‘stuff’ packed into the same amount of space as the water, so it’s lighter and floats.
When you add food coloring, you’ll see it sinks through the oil and mixes with the water. That’s because food coloring is water-based, so it’s polar like water and mixes with it, but not with the oil.
Witnessing Chemical Reactions in Action
When you drop in an antacid tablet or use baking soda and vinegar, you get to see a chemical reaction happen right before your eyes! These reactions create tiny bubbles of gas. It’s like magic, but it’s science. The gas bubbles are lighter than the liquids, so they float up. As they rise, they grab onto some of the colored water and carry it up through the oil. When the bubbles reach the top and pop, the gas escapes, and the water, now heavier again, sinks back down. It’s a cycle that keeps the lava lamp moving.
The Role of Gas Bubbles in the Motion
Those little gas bubbles are the real stars of the show. They’re what make the colored blobs move up and down. Without them, the oil and water would just sit there, separated. The bubbles act like tiny elevators, lifting the water. When the elevator reaches the top and the gas disappears, the water has to come back down. It’s a simple but effective way to see how gases can affect liquids and create movement. It’s a great way to talk about how things that are lighter float and things that are heavier sink.
Taking the Learning Further: Advanced Explorations
So, you’ve made a basic lava lamp and everyone’s had a blast watching the blobs dance. That’s awesome! But what if you want to take it up a notch? There’s actually a lot more you can do with this simple science experiment to keep the curiosity going. It’s like finding hidden levels in a video game, but with science.
Experimenting with Different Oils
Not all oils are created equal, and they can totally change how your lava lamp looks and acts. Vegetable oil is pretty standard, but have you ever tried baby oil? It’s usually clearer, which might make the colors pop more. Or what about olive oil? It’s a bit thicker and often has a greenish tint. This can make the “lava” blobs harder to see, but it’s a great chance to talk about why clarity matters in an experiment.
Here’s a quick way to compare:
| Oil Type | Clarity | Expected Blob Movement | Notes |
|---|---|---|---|
| Vegetable Oil | Medium | Standard | Common choice, good visibility |
| Baby Oil | High | Potentially Faster | Clearer, might show more detail |
| Olive Oil | Low | Slower, Less Visible | Greener tint, good for discussion |
Investigating Temperature Effects
Temperature is a big deal in science, and it plays a role here too. What happens if you use really cold water instead of room temperature water? Or maybe even slightly warm water? You might notice the bubbles move slower when it’s colder. That’s because chemical reactions often slow down when things get chilly. It’s a neat way to see physics and chemistry working together right in your living room.
Observing Container Shape Variations
Think about the container you used. Did you use a tall, skinny bottle or a short, wide jar? The shape of the container can actually change how the “lava” moves. Does it seem to travel faster in a narrow space, or does it have more room to spread out in a wider one? It’s fun to see how the same science can look different just by changing the vessel.
The beauty of these advanced explorations is that they turn a simple demonstration into a real investigation. By changing just one thing at a time – like the type of oil or the water temperature – kids learn the scientific method without even realizing it. They’re making predictions, observing results, and thinking about why things happen the way they do. It’s all about encouraging that natural sense of wonder and showing them that science is a continuous process of discovery.
Safety First for Budding Scientists
When we’re making our homemade lava lamps, it’s super important to remember that even though we’re using stuff from the kitchen, it’s still a science experiment. That means we need to be careful and smart about how we do it. Adult supervision is always the most important rule. It’s not just about watching; it’s about guiding and making sure everyone is safe.
Adult Supervision is Key
Having a grown-up there means they can help with tricky steps, like pouring liquids, and make sure no one tries to taste the experiment. They’re there to help things go smoothly and safely.
Handling Materials with Care
We need to talk about a few specific things to watch out for:
- Don’t Cap It While It’s Fizzing: When the antacid tablet or salt makes those cool bubbles, it’s releasing gas. If you put a lid on the bottle, the gas can build up too much pressure and make the bottle burst. So, keep the lid off while the magic is happening!
- Nothing to Eat Here: Even though the ingredients are common, this lava lamp isn’t for eating. We need to make it clear that science experiments are for observing, not tasting. Keep hands clean before and after.
- Oil Disposal: Remember, oil doesn’t go down the drain. It can clog up pipes. It’s best to pour the used oil into a separate container and throw it away with the regular trash, or check with your local waste service for how they prefer you handle used cooking oil.
Ensuring an Age-Appropriate Experience
Think about who is doing the experiment. For younger kids, maybe just the antacid tablet method is best. Older kids might be ready to try the salt or baking soda and vinegar methods, or even experiment with different oils. It’s all about making sure the activity fits the age and ability of the scientists involved. We want it to be fun and educational, not scary or confusing. If something doesn’t work quite right, that’s okay too! It’s a chance to ask questions and figure out why, which is a big part of science.
Making Science a Family Affair
Hands-On Learning for Lasting Memories
Getting the kids involved in making a homemade lava lamp is more than just a fun afternoon activity; it’s a chance to build some really solid memories together. When everyone’s gathered around, watching the colorful blobs rise and fall, there’s a shared sense of wonder. It’s these moments, where you’re all asking questions like, “Why is the oil floating?” or “What happens if we add more salt?”, that really stick with you. Plus, it’s a great way to get everyone off their screens and interacting with each other in a really engaging way. It’s not about getting the science perfectly right, but about the experience of doing it together.
Encouraging Curiosity and Exploration
This project is a fantastic springboard for asking questions and letting kids lead the way. Instead of just telling them what’s happening, try asking things like:
- What do you think will happen when we drop the food coloring?
- Why do you think the colored water blobs are moving?
- What would happen if we used a different kind of oil?
Letting them experiment with different amounts of ingredients or even different containers can be really eye-opening. If something doesn’t quite work as planned, it’s not a failure; it’s just a chance to figure out why. “That’s interesting! Why do you think that happened? What can we try differently next time?” This kind of approach helps build resilience and a genuine interest in how things work.
Integrating STEM into Everyday Fun
Think about it – the principles behind a lava lamp are everywhere! You can connect the separation of oil and water to why salad dressing separates in the fridge. The bubbles that make the lava move? They’re similar to the bubbles that make bread rise or even how hot air balloons float.
By turning simple kitchen items into a science experiment, you’re showing kids that science isn’t just in textbooks or labs; it’s a part of our everyday lives. It makes learning feel more relevant and exciting, sparking a curiosity that can last a long time. It’s a simple way to weave learning into the fabric of family time, making even a regular weekend feel a bit more magical.
It’s also a good reminder about how we handle materials. Always make sure kids know not to taste the experiment and to keep things clean. And when it’s time to clean up, remember that oil shouldn’t go down the drain – maybe save it for another experiment or check local guidelines for proper disposal.
Keep the Science Fun Going!
So there you have it – your very own mesmerizing lava lamp, made right in your kitchen! It’s more than just a cool visual; it’s a fantastic way to show kids how science works using everyday stuff. You saw how different liquids don’t always mix and how a little fizz can make things move. This project is a great starting point for lots of family science fun. Don’t stop here; keep exploring, keep asking questions, and keep making memories together. Who knows what amazing discoveries you’ll make next!
Frequently Asked Questions
What makes the blobs move in a homemade lava lamp?
It’s all about density and a chemical reaction! When you add an ingredient like an antacid tablet to water and oil, it creates gas bubbles. These bubbles attach to the colored water, making it less dense than the oil. The bubbly water floats to the top. Once the bubbles pop, the water becomes dense again and sinks back down. This up-and-down motion is what creates the lava lamp effect.
Can I use different liquids besides oil and water?
You can experiment with different types of oils, like baby oil or clear vegetable oil. Water and oil don’t mix because of something called polarity – water molecules like to stick together, and oil molecules like to stick together, but they don’t like sticking to each other. This difference is key to making the lamp work.
What happens if I use salt instead of an antacid tablet?
Using salt creates a different kind of reaction. When you sprinkle salt into the oil and water mixture, it sinks through the oil and carries some of the colored water with it. When the salt dissolves in the water at the bottom, the water is released and floats back up. It’s a slower, gentler movement compared to the fizzing of an antacid tablet.
Is it safe for kids to make a lava lamp?
Yes, it’s a very safe and fun science project for kids, but adult supervision is always a good idea, especially when handling materials. Make sure to use non-toxic ingredients and a sturdy container that won’t easily tip over. It’s a great way to teach kids about science safely.
How can I make my lava lamp glow?
To get a cool glowing effect, try using a flashlight! Shine the light from underneath or behind your lava lamp in a dimly lit room. The light shines through the colored blobs and the oil, making the movement look even more magical and mesmerizing, just like a real lava lamp.
What scientific ideas does this project teach?
This project is fantastic for learning about several science concepts. You’ll see density in action as liquids separate and blobs rise and fall. You’ll also witness chemical reactions when you add things like antacid tablets or baking soda and vinegar, which produce gas. It’s a hands-on way to understand how these principles work together.


Ms. Kerri’s Corner provides a exciting virtual space for preschool learning. Through a variety of engaging activities, she exposes young minds to early math, literacy, science and social-emotional skills in a developmentally appropriate way. Centers for blocks, art, books and music allow children to explore hands-on learning at their own pace. Guided lessons subtly introduce number sense, letter sounds and narrative thinking. Careful observation gives insight into each child’s progress across domains. Viewers are also invited to participate, reinforcing that their ideas are valued. By making learning fun yet purposeful, Ms. Kerri lays the groundwork for future academic success while fostering creativity and imagination. Her program offers preschoolers valuable screen-based learning experiences.