I still remember the first time I tried to set up STEM learning centers for preschool in my classroom. I had grand visions of tiny engineers building bridges and mini scientists conducting experiments. What I actually got was chaos, scattered blocks everywhere, and kids using the magnifying glasses to look at each other’s eyeballs.
But here’s what I learned: a great preschool STEM classroom setup isn’t about having the fanciest equipment or the most Pinterest-worthy spaces. It’s about creating intentional areas where curiosity can thrive and little hands can explore without you losing your mind in the process.
After years of trial and error, I’ve figured out what actually works. So let me save you some sanity and share how to set up STEM learning centers that your preschoolers will love—and that you can actually manage.
Why STEM Learning Centers Matter for Preschoolers
Before we dive into the how, let’s talk about the why. Here’s the thing: preschoolers are natural-born scientists and engineers. They’re constantly testing gravity by dropping things, experimenting with cause and effect, and building elaborate structures just to knock them down.

STEM learning centers for preschool simply give structure and intention to what they’re already doing. These centers build critical thinking skills, problem-solving abilities, and persistence—all while kids think they’re just playing.
The Foundation of a Great Preschool STEM Classroom Setup
Start with Zones, Not Stuff
The biggest mistake I made early on? Buying tons of materials before thinking about the actual layout. Even the coolest robotics kit won’t work if kids can’t access it or if it’s competing with five other activities in the same square foot.
Your preschool STEM classroom setup should have clear, defined zones. Think about traffic flow, noise levels, and how activities complement or compete with each other.
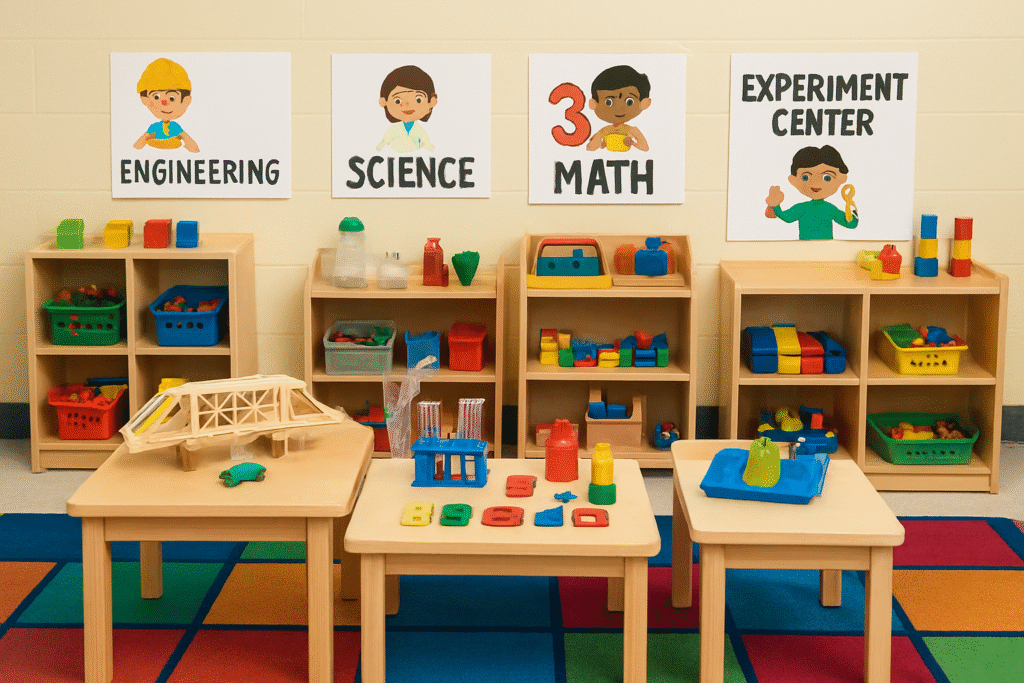
The Essential STEM Centers
1. Building and Engineering Center
Stock it with wooden blocks, cardboard boxes and tubes, connecting toys like Legos, recyclables, and pictures of structures for inspiration. Keep a basket of tape, string, and child-safe scissors nearby for creative connections.
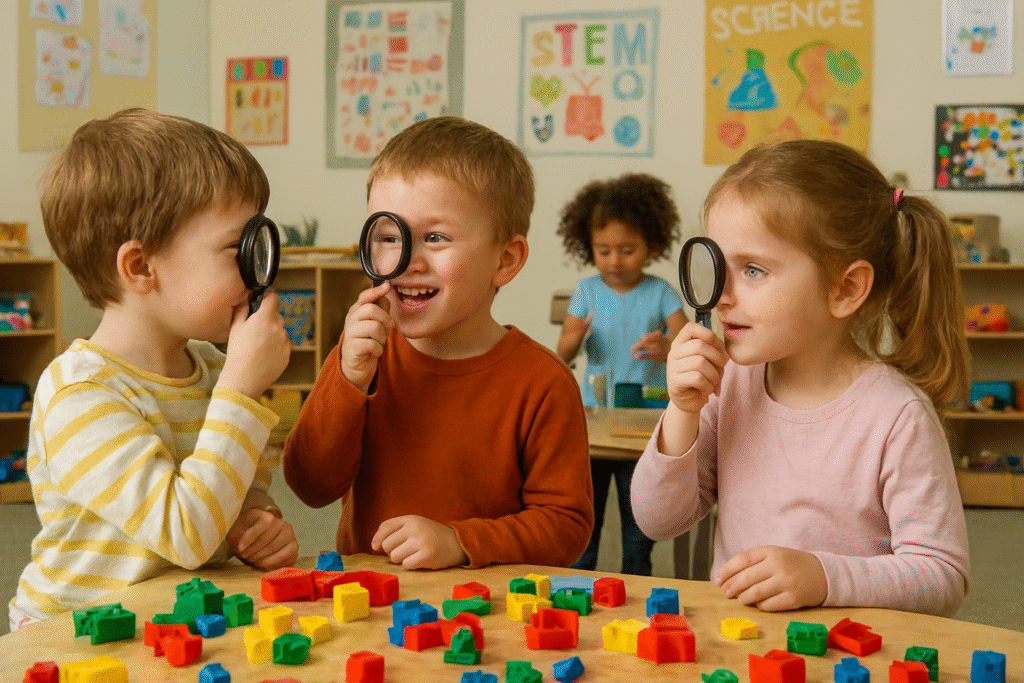
2. Science Discovery Center
Include magnifying glasses, natural materials like pinecones and shells, sensory bins, simple tools like droppers and tweezers, scales for comparing weights, and living things to observe. The key here is rotation—switch out materials every few weeks to keep curiosity fresh. For more science exploration ideas, check out Teach Preschool for amazing resources.
3. Technology and Tools Center
“Technology” for preschoolers means understanding how tools work. Try safe, real tools like screwdrivers (with supervision), old electronics to take apart, gears and simple machines toys, timers, and flashlights. Watching a four-year-old discover how a screwdriver works is honestly more exciting than you’d think.
4. Math and Patterns Center
Fill this space with sorting trays, pattern blocks, counting manipulatives, number puzzles, measuring tools, and graphing materials. Math isn’t just counting—it’s everywhere in STEM.
5. Tinkering and Makerspace Center
This is the creative heart of your preschool STEM classroom setup. Stock it with cardboard, paper, fabric scraps, tape, glue, pipe cleaners, craft sticks, and recyclables. The messier this center can get, the better the learning.
Setting Up Your Space: The Practical Stuff
Storage That Actually Works
Clear containers are your best friend—kids can see what’s inside, and you can see when something’s running low. Label them with both words and pictures.
Low shelves are essential. If kids can’t reach it independently, they’ll either bug you constantly or give up.
Rotation bins save your sanity. Keep some materials in storage and rotate them into your STEM learning centers for preschool every month. For practical classroom organization strategies, Pre-K Pages has tons of helpful ideas.
Creating Clear Boundaries
Use rugs or tape on the floor to define spaces, low shelving units as dividers, and color coding for different centers. Make it crystal clear where each center begins and ends.
The Right Number of Kids Per Center
Not every center needs to accommodate six kids. Here’s what works:
- Building center: 3-4 kids
- Science discovery: 2-3 kids
- Tinkering space: 2-4 kids
- Math center: 2-3 kids
- Technology/tools: 1-2 kids (for safety)
Use visual cues like picture cards to show how many friends can be in each center.
Making Your STEM Centers Come Alive
Provocations and Invitations to Learn
Don’t just set up STEM learning centers for preschool and walk away. Create “provocations”—intentional setups that spark curiosity.
For example:
- In the building center, set out photos of bridges with a challenge: “Can you build a bridge strong enough for this toy car?”
- In science, place ice cubes with toys frozen inside alongside tools like salt and warm water
- In the makerspace, set out materials with a question: “What could you make for our class teddy bear?”
Fairy Dust Teaching has brilliant ideas for creating these provocations.
Documentation and Reflection
Take photos of their creations, write down their observations, and display them at kid-eye level. Create a “scientist wall” or “engineer gallery.” This teaches kids that their ideas matter and that STEM is about the process, not just the product.
Budget-Friendly Tips
The best STEM learning centers for preschool don’t require expensive materials.
Hit up your recycling bin: Cardboard tubes, egg cartons, and plastic bottles are engineering gold.
Ask for donations: Send a wish list home to families.
Shop dollar stores: You can find measuring cups, containers, and tools for a fraction of the cost.
Use nature: Sticks, rocks, leaves, and pinecones are free and endlessly fascinating.
Common Challenges and Real Solutions
“They just make a mess and walk away!”
Set up a cleanup system with labeled bins and before/after photos showing how materials should look. Build in transition warnings: “In five minutes, we’ll be cleaning up.”
“They fight over materials constantly.”
Add duplicates of popular items or create a sign-up system with a sand timer.
“I don’t know enough about STEM to teach it.”
You don’t need to be an engineer! Your role is to facilitate exploration and ask good questions. “I wonder why that happened?” is the most powerful phrase in your teaching toolkit.
“They’re not using the centers the ‘right’ way.”
If a child is engaged, exploring, and thinking, they’re using it the right way. The block center might become a hospital—that’s not failure, that’s integrated learning! For more guidance on managing early childhood STEM activities, check out resources at NAEYC for evidence-based practices.
Maintaining the Magic Throughout the Year
Your preschool STEM classroom setup isn’t a “set it and forget it” situation. Keep centers thriving by:
Rotating materials regularly. Even the best center gets stale after a month.
Following the kids’ interests. If everyone’s obsessed with bugs, add bug-related materials to multiple centers.
Asking for feedback. Even preschoolers can tell you what they like.
Observing and adjusting. If nobody’s using a center, figure out why and change it up.
Celebrating discoveries. When a child solves a problem, make a big deal about it!
Your Turn to Create STEM Magic
Setting up STEM learning centers for preschool doesn’t have to be overwhelming. Start with one or two centers and build from there. Use what you have. Follow your students’ curiosity.
Your preschool STEM classroom setup will be uniquely yours, shaped by your space, your students, and your personality. And that’s exactly how it should be.
The most important ingredient isn’t the fanciest materials—it’s you, noticing, wondering, and exploring alongside your students. When you create spaces where questions are welcomed and experimentation is encouraged, you’re building lifelong learners who believe they can figure things out.
So grab some cardboard boxes, clear out a corner, and get started. Your future scientists, engineers, and problem-solvers are waiting.


Ms. Kerri’s Corner provides a exciting virtual space for preschool learning. Through a variety of engaging activities, she exposes young minds to early math, literacy, science and social-emotional skills in a developmentally appropriate way. Centers for blocks, art, books and music allow children to explore hands-on learning at their own pace. Guided lessons subtly introduce number sense, letter sounds and narrative thinking. Careful observation gives insight into each child’s progress across domains. Viewers are also invited to participate, reinforcing that their ideas are valued. By making learning fun yet purposeful, Ms. Kerri lays the groundwork for future academic success while fostering creativity and imagination. Her program offers preschoolers valuable screen-based learning experiences.