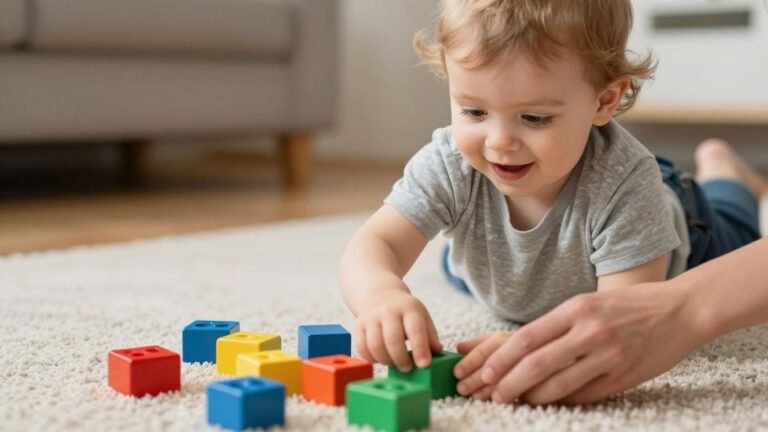
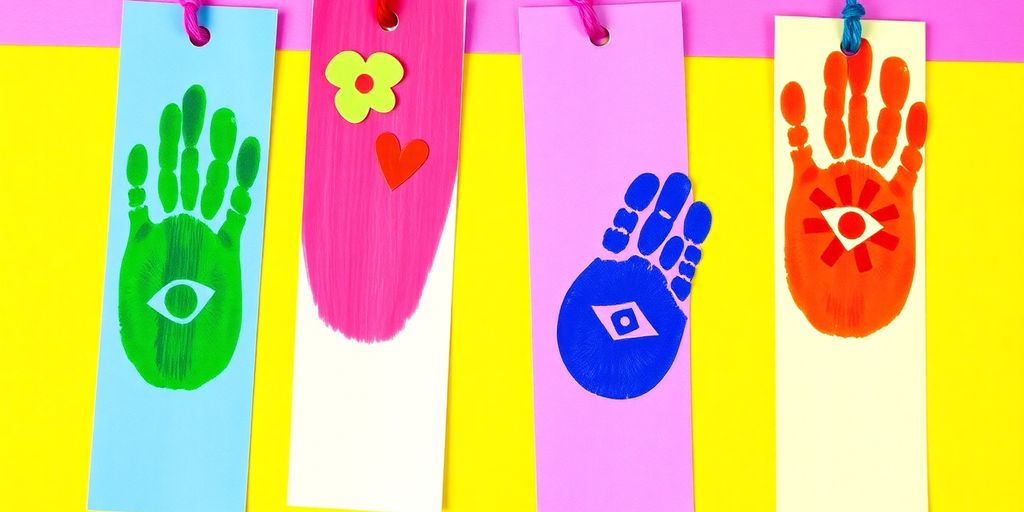
Simple Mother’s Day Fingerprint Bookmarks Kids Can Make
Mother’s Day is a special occasion to show appreciation for the moms in our lives. One thoughtful way to do this is by creating personalized gifts that come straight from the heart. Fingerprint bookmarks are not only easy to make, but they also allow kids to express their creativity while making something meaningful for their mothers. In this guide, we’ll explore how to create these charming bookmarks, offering step-by-step instructions and fun variations to make the project even more special. Let’s dive into some easy Mother’s Day crafts that will surely bring a smile to Mom’s face!
Key Takeaways
- Fingerprint bookmarks are simple and heartfelt gifts for Mother’s Day.
- Kids can use various materials like ink pads or paint to create unique designs.
- Incorporating personal messages adds a special touch to the bookmarks.
- Laminating the bookmarks makes them durable and long-lasting.
- Engaging kids in the crafting process fosters creativity and family bonding.
Creating Personalized Fingerprint Bookmarks
Choosing the Right Materials
Okay, so first things first, you gotta gather your supplies. This isn’t rocket science, but having the right stuff makes a difference. You’ll need some sturdy cardstock – the thicker, the better, so the finished fingerprint bookmarks don’t flop around. Regular paper is too flimsy. Then, grab some non-toxic ink pads in various colors. Make sure they’re washable, because, well, kids. Also, have baby wipes or a damp cloth handy for quick clean-up. Finally, gather scissors, a hole punch (if you want to add a ribbon), and maybe some embellishments like glitter or small stickers.
- Cardstock (various colors)
- Washable ink pads (non-toxic)
- Baby wipes or damp cloth
- Scissors
Preparing the Bookmark Template
Before you unleash the little artists, prep the bookmark templates. You can either cut rectangles from cardstock – about 2 inches by 6 inches is a good size – or get fancy and use a die-cut machine for fun shapes. If you’re feeling extra creative, you can even print out templates with pre-designed borders or simple outlines. This gives the kids a starting point and helps contain the fingerprint art.
I like to round the corners of the bookmarks to make them look a bit more polished and prevent them from bending easily. It’s a small detail, but it makes a big difference in the overall look.
Inking Techniques for Fingerprints
Now for the fun part! Show the kids how to gently press their fingers onto the ink pad, making sure to cover the entire fingerprint area. The key is to not use too much ink, or the prints will smudge. Practice on a scrap piece of paper first to get the hang of it. Encourage them to experiment with different colors and finger positions to create unique designs. For example, they can use their thumb to make a larger print or their pinky for a smaller, more delicate one. Remember to clean their fingers between colors to avoid muddying the inks.
Fun Variations on Fingerprint Designs

Flower Shapes and Patterns
Okay, so you’ve got the basic fingerprint down. Now, let’s get fancy! Instead of just random prints, think about making actual flower shapes. You can use different colors for the petals and a contrasting color for the center. Try overlapping the fingerprints slightly to create a fuller, more realistic flower look.
- Daisy: Use white fingerprints around a yellow center.
- Rose: Swirl red or pink fingerprints in a circular pattern.
- Tulip: Create a cup shape with your fingerprints.
Heart Designs for Moms
What’s more Mother’s Day than a heart? This is super simple but really effective. You can either make a single big heart using lots of fingerprints, or create a pattern of smaller hearts all over the bookmark. For a cool effect, try using shades of pink and red to give the heart some depth. You can even make a heart border around the edge of the bookmark.
Adding Colorful Accents
Don’t limit yourself to just fingerprints! Once you’ve got your basic design down, add some extra details with markers or colored pencils. Draw stems for your flowers, add leaves, or outline your heart shapes. Glitter glue can also add a fun, sparkly touch. Get creative and let your personality shine through! Consider using fingerprint art to make the bookmark even more special.
Remember, the goal is to make something unique and from the heart. Don’t worry about perfection; it’s the thought that counts. Have fun experimenting with different colors and patterns until you find something you love.
Incorporating Messages and Quotes

Choosing Heartfelt Messages
Selecting the right message can transform a simple fingerprint bookmark into a treasured keepsake. Think about what makes your mom special and try to capture that in a few words. It could be a simple “I love you,” a thank you for her support, or a reminder of a shared memory. The goal is to choose something genuine that will bring a smile to her face every time she uses the bookmark. Consider these options:
- A short quote about motherhood
- A personal message from the child
- An inside joke or a special saying
Using Fun Fonts for Personalization
The font you choose can add another layer of personality to your bookmark. Don’t just stick with plain, boring fonts! Experiment with different styles to find one that complements the overall design and reflects your mom’s personality. Here are some ideas:
- Handwritten-style fonts for a personal touch
- Bold, playful fonts for a fun-loving mom
- Elegant, classic fonts for a sophisticated mom
Adding a Poem or Special Note
Why not include a short poem or a special note to make the bookmark even more meaningful? It doesn’t have to be anything elaborate – even a few lines can express your love and appreciation. You can write the poem yourself or find a Mother’s Day bookmark poem online. Here are some ideas for what to include:
- A short, original poem about your mom
- A favorite quote about motherhood
- A list of things you love about your mom
Adding a personal message or poem turns a simple craft into a heartfelt expression of love. It shows that you put thought and effort into creating something special just for her, making it a gift she’ll cherish for years to come.
Laminating and Finishing Touches
Why Laminate Your Bookmark?
Okay, so you’ve got these adorable fingerprint bookmarks, and you want them to last, right? That’s where laminating comes in. Laminating basically seals the bookmark in plastic, protecting it from spills, tears, and general wear and tear. Think of it as giving your little masterpiece a suit of armor. Plus, it makes the colors pop a bit more, which is always a bonus. If you don’t have a laminator, many office supply stores offer lamination services for a small fee. It’s a worthwhile investment to preserve those precious fingerprints!
Adding Ribbons and Embellishments
Time to jazz things up! Adding ribbons and other embellishments can take your fingerprint bookmark from cute to absolutely adorable. Here are some ideas:
- Ribbons: Choose colors that complement the fingerprint design. A simple satin ribbon works great, or you could go for something fancier like grosgrain or even lace.
- Tassels: A small tassel adds a touch of elegance. You can buy pre-made tassels or make your own using embroidery floss.
- Beads: String a few beads onto the ribbon or tassel for extra sparkle. Small wooden beads or colorful plastic beads work well.
- Charms: Attach a small charm that reflects Mom’s interests. A heart, a flower, or even a tiny book charm would be perfect.
Tips for a Professional Finish
Want your bookmark to look like it came straight from a boutique? Here are a few tips to achieve a professional finish:
- Trim Carefully: Use sharp scissors or a paper cutter to trim the laminated bookmark. A clean, straight edge makes a big difference.
- Round the Corners: Use a corner rounder punch to soften the edges and prevent them from bending or peeling.
- Use Quality Materials: Invest in good quality cardstock, laminating pouches, and embellishments. It’s worth it for a polished look.
- Consider Double-Sided Lamination: For extra durability, laminate both sides of the bookmark, even if only one side has the design.
Taking the extra time to add these finishing touches really elevates the gift. It shows Mom that you put thought and care into creating something special just for her. It’s the little things that make a big impact!
Gift Presentation Ideas

Creative Ways to Wrap Bookmarks
Okay, so the kids have made these adorable fingerprint bookmarks. Now what? Don’t just hand them over! Let’s make the presentation special. Think beyond the standard gift bag.
- Use decorative paper: Wrap the pressed flower bookmarks like a tiny scroll, tying it with twine or ribbon.
- Create a custom envelope: Kids can decorate plain envelopes with markers, stickers, or even more fingerprints!
- Upcycle materials: Cut out a shape from a cereal box, decorate it, and use it as a backing for the bookmark.
Making a Card to Accompany the Gift
A card adds a personal touch. It doesn’t have to be fancy; the thought counts. Get the kids involved in making it!
- Handmade cards: Fold a piece of construction paper in half and let the kids decorate it with drawings, stickers, and heartfelt messages.
- Printable templates: Find free printable cards online that kids can color in.
- Personalized messages: Encourage kids to write why they love their mom or a special memory they share. Authenticity is key here.
Using a Gift Bag for Presentation
If you’re short on time, a gift bag is a great option. But let’s elevate it a bit!
- Decorate the bag: Use stamps, stickers, or markers to personalize a plain gift bag.
- Add tissue paper: Choose colors that complement the bookmark and add some flair to the presentation.
- Include extra goodies: Throw in some candies, a small notepad, or a pen to make the gift even more special.
Presentation matters! It shows that you put thought and effort into the gift, making it even more meaningful for Mom. It’s the little things that count, right?
Engaging Kids in the Crafting Process
Encouraging Creativity and Expression
It’s important to let kids take the lead! Don’t worry about perfection; the goal is to have fun and express themselves. Let them choose colors, patterns, and even the messages they want to include. Provide a variety of materials and let their imagination run wild.
Making It a Family Activity
Turn crafting into a bonding experience. Put on some music, make some snacks, and create together. Older siblings can help younger ones, and parents can participate too. It’s a great way to spend quality time and create lasting memories.
Tips for Younger Children
Crafting with toddlers and preschoolers requires some adjustments. Here are a few ideas:
- Use non-toxic, washable paints.
- Prepare the workspace to minimize mess.
- Focus on simple designs and techniques.
- Keep the activity short and sweet to maintain their attention.
Remember, the process is more important than the product. Focus on having fun and creating a positive experience for everyone involved. The goal is to create a special Mother’s Day craft ideas that mom will cherish, made with love and little fingerprints.
Celebrating Mother’s Day with Crafts

The Importance of Handmade Gifts
There’s just something special about a gift made with your own two hands. It shows you put in extra thought and effort, and that’s what makes it so meaningful. Store-bought gifts are nice, but a handmade item? That’s a treasure. It’s a tangible representation of love and care, something that can’t be replicated by a machine. Plus, it’s a fun way to get creative and express yourself. When kids make something for their moms, it’s not just a gift; it’s a piece of their heart.
Creating Lasting Memories
Crafting together for Mother’s Day isn’t just about the finished product; it’s about the experience. Think about it: you’re spending quality time together, laughing, maybe making a little mess, and creating something special. These are the moments that become cherished memories. Years from now, you might not remember what you bought at the store, but you’ll definitely remember the day you made those fingerprint crafts together. It’s a way to bond and create a tradition that can be passed down through generations.
Sharing the Finished Products
Once those adorable fingerprint bookmarks are done, it’s time to share the love! Here are some ideas:
- Present them with a handwritten card.
- Wrap them in pretty paper or a small gift bag.
- Take a photo of your child presenting the gift and send it to family members.
The joy of giving a handmade gift is contagious. When kids see the happiness their creations bring, it encourages them to continue crafting and expressing their creativity. It’s a win-win for everyone involved!
It’s not just about giving to Mom, either. Consider making extra bookmarks to give to grandmothers, aunts, or any other special women in your life. Spreading the love is what Mother’s Day is all about!
Wrap-Up
In the end, making these fingerprint bookmarks for Mother’s Day is a fun and easy way for kids to show their love. It’s a simple craft that doesn’t take much time or supplies, but the results are so special. Moms will cherish these little keepsakes, and kids will feel proud to give them. Plus, it’s a great way to get creative and spend some quality time together. So grab those ink pads and let the kids get to work! Happy crafting!
Frequently Asked Questions
What materials do I need to make fingerprint bookmarks?
You will need ink pads or washable paint, cardstock for the bookmarks, and possibly scissors and ribbons for decoration.
How can I prepare the bookmarks for fingerprinting?
You can print out bookmark templates, cut them to size, and have the kids stamp their thumbs and fingers on them.
Are there different designs I can create with fingerprints?
Yes! You can create flowers, hearts, or even abstract designs using fingerprints.
How can I add messages to the bookmarks?
You can write heartfelt messages or quotes on the bookmarks using fun fonts or colorful markers.
Why should I laminate the bookmarks?
Laminating helps protect the bookmarks from wear and tear, making them last longer.
What are some fun ways to present the bookmarks as gifts?
You can wrap them creatively, include a handmade card, or place them in a decorative gift bag.


Ms. Kerri’s Corner provides a exciting virtual space for preschool learning. Through a variety of engaging activities, she exposes young minds to early math, literacy, science and social-emotional skills in a developmentally appropriate way. Centers for blocks, art, books and music allow children to explore hands-on learning at their own pace. Guided lessons subtly introduce number sense, letter sounds and narrative thinking. Careful observation gives insight into each child’s progress across domains. Viewers are also invited to participate, reinforcing that their ideas are valued. By making learning fun yet purposeful, Ms. Kerri lays the groundwork for future academic success while fostering creativity and imagination. Her program offers preschoolers valuable screen-based learning experiences.