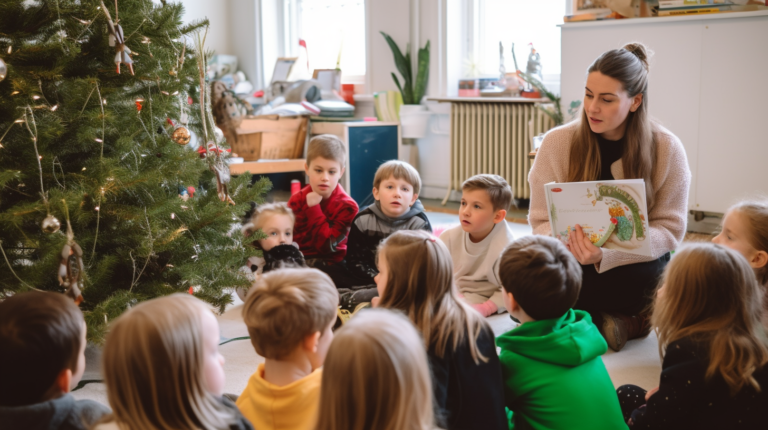
6 Simple Sensory Bins for Preschool Learning
Hey there, parents and caregivers! If you’re on the hunt for some fun and educational activities for your preschooler, sensory bins might be just the thing you need. These are simple, creative play setups that engage your child’s senses and help them learn through play. You don’t need fancy materials; just everyday items can do the trick. In this article, we’ll explore six easy sensory bins you can quickly put together at home. Let’s dive into the world of sensory bins and see how they can make learning a blast for your little ones.
Key Takeaways
- Sensory bins are an easy way to engage preschoolers in hands-on learning.
- You can use common household items to create sensory bins.
- These activities help develop fine motor skills and sensory awareness.
- Sensory bins can be tailored to fit different themes and seasons.
- They provide a fun, independent playtime for kids while you get things done.
1. Kinetic Sand

Kinetic sand is like magic in a bin. It’s moldable, almost like wet sand, but without the mess. Kids love it because it’s so easy to shape and squish. Plus, it’s a great way for them to work on their fine motor skills.
Why Kinetic Sand?
- Mess-Free Fun: Unlike regular sand, kinetic sand sticks to itself, so you won’t find it all over your house.
- Therapeutic Texture: The smooth, flowing texture is soothing for both kids and adults.
- Reusable: It doesn’t dry out, so you can use it over and over again.
Setting Up Your Kinetic Sand Bin
- Choose a Container: A shallow plastic bin works great.
- Add the Sand: Pour the kinetic sand into the container. You can find it in various colors.
- Include Tools and Toys: Add molds, small toys, or even cookie cutters to enhance the play.
Activities with Kinetic Sand
- Building Shapes: Encourage your child to create different shapes or structures.
- Imaginative Play: Incorporate small figures or toys to make a mini play world.
- Sensory Exploration: Let them simply run their fingers through the sand for a calming experience.
Kinetic sand is not just a toy; it’s a sensory experience that captivates and engages young minds.
2. Dyed Rice

Creating a sensory bin with dyed rice is a fantastic way to engage preschoolers in a colorful and tactile experience. Dyed rice is not only visually appealing but also easy to make at home, allowing for a wide array of creative possibilities.
Start by gathering your materials. You’ll need plain rice, food coloring, and a resealable plastic bag. To color the rice, place 2-3 cups of rice into the bag, add a few drops of food coloring, seal the bag, and shake until the rice is evenly coated. For faster drying, spread the rice on a baking sheet lined with parchment paper and let it sit for a few minutes.
Once your rice is ready, it’s time to set up the sensory bin. Fill a container with the colored rice and add some fun elements like small toys or scoops. This not only makes the bin more interesting but also helps in developing fine motor skills as children scoop and pour the rice.
Sensory bins like these offer a simple yet effective way to stimulate a child’s senses and encourage imaginative play.
For more ideas on how to dye rice in vibrant colors and incorporate it into sensory play, make sure to check out the easy recipe that can be ready for same-day use. It’s perfect for enhancing any sensory play theme!
3. Cloud Dough

Introduction
Cloud dough is a fantastic sensory material that feels silky and smooth, making it perfect for little hands to explore. It’s easy to make and provides endless fun for preschoolers.
Materials Needed
- 8 cups of flour
- 1.5 cups of vegetable oil
- Vanilla extract (optional for scent)
- Cookie cutters
- Mixing bowl
- Spoon
Instructions
- Combine Ingredients: In a large mixing bowl, combine the flour and vegetable oil. Stir until the mixture resembles wet sand. If you want a pleasant scent, add a tablespoon of vanilla extract.
- Transfer to Bin: Pour the mixture into a sensory bin, spreading it out evenly.
- Add Tools: Include cookie cutters and small cups for shaping and molding the dough.
Benefits
- Tactile Experience: Cloud dough offers a unique texture that’s both crumbly and moldable, which is excellent for developing fine motor skills.
- Creative Play: Kids can use cookie cutters to create different shapes, enhancing their creativity and imagination.
Cloud dough is not just about playing; it’s a sensory adventure that encourages kids to explore textures and shapes.
Tips for Parents
- Encourage your child to describe how the cloud dough feels. Is it soft? Does it crumble easily?
- Make it a hands-on cooking experience by pretending to “bake” cookies with the dough, fostering creativity and teamwork.
- Store the dough in an airtight container to keep it fresh for future play sessions.
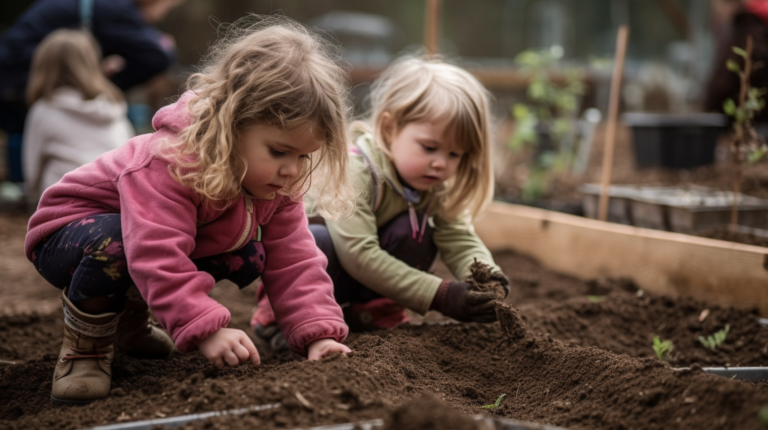
4. Corn Kernels
Corn Kernels Sensory Bin
Corn kernels make a fantastic base for sensory bins. They’re simple, natural, and offer a unique texture for little hands to explore. Preschoolers will love the feel of corn kernels slipping through their fingers.
Materials Needed
- Large container or bin
- Unpopped corn kernels
- Small scoops or spoons
- Toy farm animals or tractors
- Measuring cups
Setting Up the Bin
- Pour a generous amount of corn kernels into the bin. Make sure there’s enough to cover the bottom and allow for some scooping.
- Add in the toy farm animals and tractors. Let your child arrange them however they like.
- Include a few measuring cups and spoons for scooping and pouring.
Activities to Try
- Scooping and Pouring: Kids can practice their fine motor skills by using scoops and spoons to transfer kernels between containers.
- Farm Play: Encourage imaginative play by having your child create a farm scene with the toy animals and tractors.
- Counting Game: Use the kernels to practice counting. Ask your child to count out a specific number of kernels or group them into sets.
Sensory bins like this one are not just fun but also educational. They help develop motor skills, encourage imaginative play, and introduce basic math concepts like counting and grouping.
Corn kernels are not only easy to find but also versatile. You can easily switch up the toys and tools you include to keep the activity fresh and engaging for your little one. Plus, the sound of kernels being poured and scooped adds an auditory element to the sensory experience. Enjoy watching your child discover and learn through play!
5. Shredded Paper
Why Shredded Paper?
Shredded paper is an amazing sensory material. It’s cheap, easy to find, and super versatile. You can use it for all kinds of themes and activities. Plus, it’s a great way to recycle old documents or junk mail.
Materials Needed
- A large sensory bin
- Shredded paper (any color)
- Small toys or themed items (like plastic animals or cars)
- Scoops, cups, or small containers
Setting Up the Sensory Bin
- Fill the Bin: Start by filling your sensory bin with shredded paper. You can use plain white, but colored paper can make it more fun.
- Add Toys: Mix in small toys or items related to your theme. For example, add ocean-themed toys for a beach adventure.
- Provide Tools: Give the kids scoops, cups, or small containers to explore with.
Playing and Learning
- Imagination Play: Kids can pretend the shredded paper is grass, water, or anything else their imagination comes up with.
- Fine Motor Skills: Encourage them to use scoops or their hands to move the paper around, which helps develop fine motor skills.
- Sorting and Counting: You can add colored paper and ask kids to sort or count the pieces.
Shredded paper bins are not only fun but also a great way to engage kids in imaginative play. They learn without even realizing it, and that’s the best kind of learning.
6. Oats

Oats are a versatile and fun base for a sensory bin that can keep preschoolers entertained and learning. With their soft and grainy texture, oats offer a unique sensory experience that can be both soothing and stimulating for little hands.
- Materials Needed:
- A large bin or shallow container
- Plain oats
- Measuring cups and spoons
- Small toys, like plastic animals or cars
- Optional: cinnamon sticks or small pom-poms for added sensory elements
Setting Up the Oat Sensory Bin
- Pour the oats into the bin, spreading them evenly.
- Add in the small toys and optional items, mixing them throughout the oats.
- Provide measuring cups and spoons for scooping and pouring.
Benefits of Oat Sensory Play
- Fine Motor Skills: Scooping and pouring oats helps develop hand-eye coordination and fine motor skills.
- Imaginative Play: Kids can create stories and scenarios with the toys.
- Sensory Exploration: The texture and smell of oats can be very engaging for young children.
Oats are not only a great sensory material, but they’re also safe if accidentally ingested, making them perfect for toddlers who are still exploring the world with their mouths.
For a bit more fun, try incorporating elements from the DIY Apple Pie Sensory Bin. The combination of oats with cinnamon sticks and red pom-poms can mimic the ingredients of a delicious apple pie, adding a layer of imaginative play and smell exploration to the activity.
Keep it simple and let the kids lead the way in their play. You’ll be amazed at the creativity and learning that unfolds with just a bin of oats and a few toys.
Wrapping Up: Sensory Bins for Preschool Fun
So there you have it, six super simple sensory bins that can make learning a blast for your preschooler. These bins aren’t just about keeping your little one busy; they’re a fantastic way to sneak in some learning while they’re having fun. Whether it’s scooping, pouring, or just exploring different textures, each bin offers something unique. Plus, they’re easy to set up and don’t require a lot of fancy materials. Just a few things you probably already have at home. So next time you’re looking for a fun, educational activity, give one of these sensory bins a try. Your preschooler will love it, and you might just enjoy putting it together too!
Frequently Asked Questions
What is the purpose of sensory bins?
Sensory bins are designed to help kids learn through play by engaging their senses. They are great for developing important skills like fine motor abilities and can also be used to teach basic math and literacy.
What can I put in a sensory bin?
You can use a variety of items like rice, beans, sand, or oats as the base. Add small toys, scoops, or themed items to match the learning objective or season.
How do sensory bins help preschoolers?
Sensory bins encourage hands-on exploration, which helps preschoolers build fine motor skills, problem-solving abilities, and creativity. They also make learning more engaging.
Are sensory bins safe for all ages?
While sensory bins are great for preschoolers, some items might be choking hazards for younger children. Always supervise play and choose age-appropriate materials.
How often should I change the sensory bin contents?
It’s a good idea to refresh the contents every few weeks or to match a new theme or season. This keeps the activity exciting and engaging for your child.
Can I use household items for sensory bins?
Absolutely! Common household items like measuring cups, spoons, and small containers can be great tools for sensory play. Be creative with what you have at home.

Ms. Kerri’s Corner provides a exciting virtual space for preschool learning. Through a variety of engaging activities, she exposes young minds to early math, literacy, science and social-emotional skills in a developmentally appropriate way. Centers for blocks, art, books and music allow children to explore hands-on learning at their own pace. Guided lessons subtly introduce number sense, letter sounds and narrative thinking. Careful observation gives insight into each child’s progress across domains. Viewers are also invited to participate, reinforcing that their ideas are valued. By making learning fun yet purposeful, Ms. Kerri lays the groundwork for future academic success while fostering creativity and imagination. Her program offers preschoolers valuable screen-based learning experiences.